
Introduction
Bathroom leak cleaning and maintenance tips are essential for keeping your home clean, safe, and free from costly water damage. Even small leaks in sinks, showers, or toilets can lead to mold growth, unpleasant odors, and structural issues if they’re not handled quickly. By learning how to spot leaks early and knowing the right cleaning and prevention methods, you can protect your bathroom and avoid expensive repairs. In this guide, we’ll share simple, practical steps to help you manage leaks effectively and keep your bathroom looking fresh and well-maintained.
Table of Contents
Common Causes of Bathroom Leaks
Bathroom leaks can happen slowly over time or appear suddenly, and understanding their causes is the first step to preventing costly damage. When using bathroom leak cleaning and maintenance tips, it’s important to know where leaks commonly start and how to identify them early.
Leaking Faucets and Showerheads
Worn-out washers, loose connections, or mineral buildup can cause steady drips from faucets or showerheads. While these leaks often seem minor, they waste water and can lead to surface stains or mould growth over time.
Damaged or Cracked Tiles
Bathroom tiles are designed to act as a protective barrier. When tiles crack or grout lines wear out, water can seep underneath and damage the wall or floor structure. This hidden moisture is one of the most common causes of mould growth and musty odours.
Worn-Out Toilet Seals
The wax ring seal under the toilet keeps water from leaking at the base. Over time, this seal can break down, leading to slow leaks that cause stains, damp floors, or even rot in the subfloor.
Pro Tip: If you notice water pooling around the toilet base, this is likely the cause.
Faulty Pipe Connections
Pipes located behind walls or under sinks may become loose due to vibration, corrosion, or ageing. These leaks may not be visible at first but can create wet patches on walls, ceilings, or inside cabinets.
Poor Ventilation and Moisture Buildup
Even if you don’t see an active leak, constant moisture can act like one. Bathrooms without proper ventilation trap steam, which leads to condensation on windows, walls, and ceilings. Over time, this moisture encourages mould and mildew, making leak issues appear worse.
Tip: Running an exhaust fan during and after showers helps reduce humidity.
By understanding these common causes, you can take preventative steps and apply the right bathroom leak cleaning and maintenance tips before damage spreads. Early detection and timely fixes not only protect your bathroom but also save money in the long run.
Signs You Have a Bathroom Leak (Early Detection Tips)
Identifying a bathroom leak early can save you from expensive repairs and major damage later on. When applying bathroom leak cleaning and maintenance tips, it’s essential to know the warning signs before the leak becomes severe. Here are some clear indicators to watch for:
Water Stains or Discolouration
If you notice yellowish or brown stains on bathroom walls, ceilings, or the floor, it’s often a sign of hidden moisture. These stains usually appear near pipes, taps, or under the toilet.
Musty or Damp Odour
A persistent musty smell, even after cleaning, indicates trapped moisture. Hidden leaks create the perfect environment for mould and mildew to grow, causing unpleasant odours.
Pro Tip:
If the smell returns quickly after cleaning, investigate for hidden leaks.
Mould or Mildew Spots
Mould thrives in wet areas. Seeing black, green, or white mould patches around shower corners, tile grout, or under sinks may indicate water leakage.
Peeling Paint or Bubbling Walls
When moisture builds up behind paint or wallpaper, it causes the surface to bubble, peel, or warp. This is a strong sign that water is leaking behind the wall structure.
Unexpected Increase in Water Bills
If your monthly water bill rises without any new usage habits, it could indicate a slow leak somewhere in the bathroom.
Quick Check:
Turn off all water sources and check if your water meter still moves — if it does, there’s a leak.
Damp or Soft Flooring
Bathroom floors are designed to handle moisture, but they should never feel soft, spongy, or uneven. This suggests water has seeped below the floor surface.
Why Early Detection Matters
Catching leaks early means:
- Lower repair costs
- Less risk of structural water damage
- Reduced mould-related health risks
- Longer lifespan for bathroom fixtures
Applying bathroom leak cleaning and maintenance tips as soon as you notice these signs can help prevent small issues from becoming costly damage.
Step-by-Step Bathroom Leak Cleaning Tips
Once you’ve identified a leak, the next step is to clean the affected area properly to prevent mould, stains, and long-term damage. These bathroom leak cleaning and maintenance tips will help you handle the situation efficiently and safely.
Step 1: Turn Off the Water Supply
Before you begin, shut off the water source connected to the leaking fixture. This stops water flow and prevents further damage while you work.
Step 2: Clear and Dry the Area
Remove any items around the leak and thoroughly dry the wet surface using towels or a microfibre cloth. Proper drying is essential to reduce mould growth.
Tip:
Use a fan or hairdryer to speed up the drying process if needed.
Step 3: Clean Mould and Stains
Leaks often leave behind stains or mildew. Use a gentle cleaning solution to remove bacteria and buildup.
Recommended Cleaning Solution:
- Fill a spray bottle with equal portions of warm water and white vinegar, then shake to blend.
- Spray over the affected surface.
- Let it sit for 10–15 minutes.
- Gently scrub the area using a soft brush, then rinse thoroughly with fresh water.
For tougher mould:
- Use a baking soda paste (baking soda + a little water).
- Scrub in circular motions, then rinse and dry.
Step 4: Repair or Seal the Leak
Depending on the cause of the leak, you may need to:
- Tighten loose faucet or pipe connections
- Replace worn-out washers or seals
- Reapply silicone caulk around bathtubs, sinks, or shower joints
- Repair cracked grout using mould-resistant grout
Even a small resealing job can stop moisture from spreading.
Step 5: Fully Dry and Ventilate the Area
After the cleaning and repairs are complete:
- Open windows for airflow
- Turn on the bathroom exhaust fan.
- Avoid using the leak-prone area for several hours.
Proper airflow ensures no moisture remains, preventing mould return.
By following these cleaning steps, you can reduce mould, limit damage, and keep your bathroom cleaner and safer. These bathroom leak cleaning and maintenance tips are simple to follow and help prevent repeat leak issues.
Bathroom Leak Maintenance Tips (Prevent Future Leaks)
Preventing leaks is always easier and more cost-effective than repairing damage afterward. By following regular cleaning habits and inspection routines, you can avoid issues before they become bigger problems. Here are some essential bathroom leak cleaning and maintenance tips to help you keep your bathroom in excellent condition:
1. Inspect Faucets and Showerheads Regularly
Check for slow drips or loose handles. These small signs can indicate worn washers or internal parts that need tightening or replacement.
Tip:
Even a small drip can waste gallons of water over time — don’t ignore it.
2. Reapply Caulk and Grout When Needed
Caulk seals the edges of your sink, tub, and shower. Grout protects the spaces between tiles. When these wear out, water slips through unnoticed and causes damage behind surfaces.
- Replace cracked or missing grout
- Apply waterproof silicone caulk to gaps and joints
Pro Tip:
Choose mould-resistant caulk for better long-term protection.
3. Check Under Sinks for Moisture
Every few weeks, open the cabinets under your sink and run your hand along the pipes and the cabinet floor. If you feel dampness or see discolouration, address it immediately.
4. Keep Your Bathroom Properly Ventilated
Moisture buildup can cause mould and mildew, even when no leak is present. Proper ventilation keeps the bathroom dry and reduces future leak risks.
Ways to improve ventilation:
- Turn on the exhaust fan before and after showers.
- Allow air circulation by leaving the door slightly open.
- If possible, open a window for natural ventilation.
5. Avoid Using Harsh Chemical Cleaners
Many common bathroom cleaners contain strong chemicals that can corrode metal parts and damage rubber seals over time. Instead, use mild cleaners like:
- Vinegar and water solution
- pH-balanced bathroom cleaners
- Baking soda mixtures
This keeps surfaces clean without harming plumbing fixtures.
6. Schedule Routine Plumbing Checks
If your home is older or you’ve had leaks before, it’s helpful to have a professional plumber inspect:
- Internal pipe connections
- Toilet seals
- Water pressure levels
Catching wear early prevents costly emergencies later.
By consistently applying these bathroom leak cleaning and maintenance tips, you can keep your bathroom healthier, prevent mould, and extend the lifespan of your fixtures. A few minutes of routine inspection each month can save both time and money in the long run.
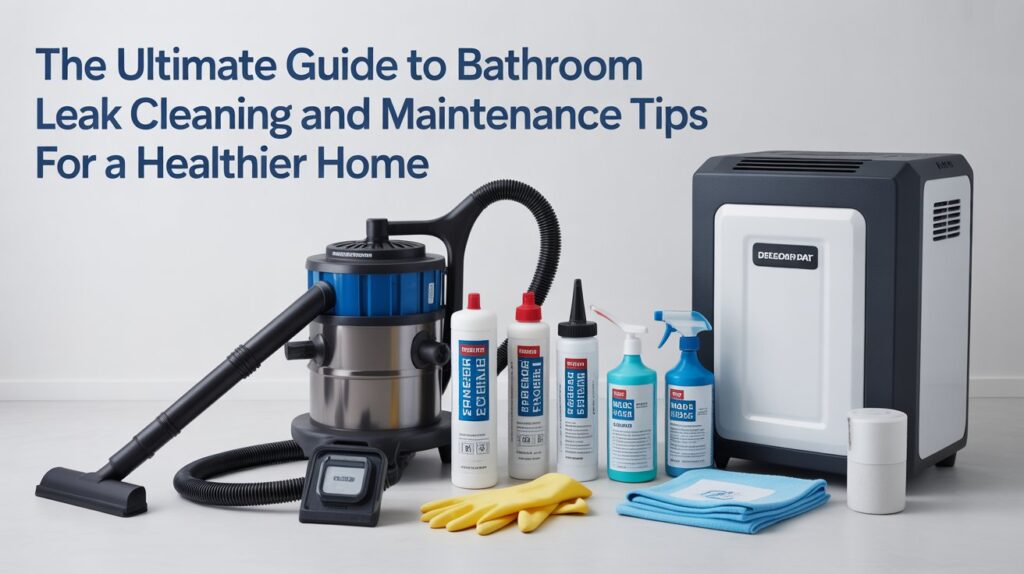
Best Tools & Products to Use for Leak Cleaning
Using the right tools and products makes the leak cleaning process easier, faster, and more effective. Whether you’re handling minor leaks or preventing future ones, the items below can help you apply your bathroom leak cleaning and maintenance tips more efficiently.
1. Silicone Caulk
Silicone caulk is essential for sealing gaps around sinks, tubs, and showers. It prevents water from sneaking behind walls and tiles.
Choose mould-resistant, waterproof caulk for long-lasting results.
2. Plumber’s Leak Seal Tape
Leak seal tape (also known as Teflon tape) is used to tighten pipe connections and stop slow drips quickly. It’s especially useful for small faucet or showerhead leaks.
Pro Tip:
Wrap the tape clockwise for a secure seal.
3. Mould-Resistant Grout
If you have cracked or worn grout between tiles, replacing it with mould-resistant grout helps prevent moisture buildup. This is important in shower areas and near the bathtub.
4. Microfibre Cloths and Scrub Brushes
Microfibre cloths are great for drying surfaces because they absorb moisture without spreading bacteria. A soft scrub brush helps remove stains and mould without damaging surfaces.
Use For:
- Cleaning tiles
- Wiping sink edges
- Drying shower walls after use
5. Eco-Friendly Bathroom Cleaners
Many chemical cleaners can damage fixtures or weaken seals over time. Instead, use gentle, safe cleaning alternatives such as:
- Vinegar and warm water mix
- Baking soda paste
- Non-toxic bathroom sprays
These cleaner options support long-term leak prevention without harming surfaces.
6. Small Handheld Dehumidifier or Exhaust Fan
A dehumidifier or properly working exhaust fan keeps humidity low and reduces the chance of mould. This is especially important in bathrooms with poor airflow.
Why Tools Matter
Using the right products helps:
- Prevent leaks from returning
- Stop mould and bacteria growth
- Extend the lifespan of tiles, faucets, and seals
- Make repairs easier to manage yourself
These simple tools pair perfectly with the bathroom leak cleaning and maintenance tips mentioned throughout this guide.
When to Call a Professional Plumber
While many small leaks can be handled with simple bathroom leak cleaning and maintenance tips, some situations require professional attention. Knowing when to call a plumber can prevent costly structural damage and ensure repairs are done safely and correctly.
The Leak Keeps Coming Back
If you’ve dried, sealed, and tightened fixtures but the leak returns, it may be due to:
- Worn internal pipe parts
- Pressure build-up
- Hidden cracks inside the plumbing
In such cases, only a professional can diagnose the underlying issue.
Water Damage to Walls, Ceilings, or Floors
If you notice:
- Soft or swollen walls
- Sagging ceilings
- Warped or spongy flooring
This suggests water has spread inside the structure. Immediate plumber assistance is necessary to prevent bigger damage.
Mould Growth That Keeps Returning
If mould continues to grow even after cleaning, moisture is still present behind surfaces. A plumber can locate hidden leaks inside walls or under floors and stop the source.
Low Water Pressure Issues
Sudden low pressure in faucets or shower heads cleaning can indicate pipe blockages or leaks within the plumbing line. Professionals have the equipment to identify and fix these problems without tearing up walls unnecessarily.
Leaks in Hard-to-Reach Areas
Leaks inside walls, beneath tiles, or under the bathtub require special tools and skill. Attempting to fix such leaks without training may cause even more damage.
Why Calling a Professional Matters
- Prevents long-term structural damage
- Ensures accurate leak detection
- Saves money on future repairs
- Protects your home from mold and rot
- Restores safety and cleanliness
Even when you follow strong bathroom leak cleaning and maintenance tips, a licensed plumber is the best solution for complex issues.
Conclusion
Bathroom leaks can start small but quickly grow into major problems if not managed properly, which is why following effective bathroom leak cleaning and maintenance tips is essential. By regularly checking faucets, grout lines, pipes, and seals, keeping proper ventilation, and cleaning moisture-prone areas, you can prevent mould growth, water stains, and structural damage. Simple habits like drying surfaces after use, reapplying caulk when needed, and using gentle cleaning products can keep your bathroom in good condition long-term. And if leaks persist or you notice signs of hidden water damage, calling a professional plumber can help ensure your bathroom stays safe, clean, and leak-free.
FAQs
How often should I check my bathroom for leaks?
It’s a good idea to inspect your bathroom every 2–4 weeks. Look for dripping faucets, loose pipe connections, moisture under sinks, and any changes in tile grout. Regular checks help you apply bathroom leak cleaning and maintenance tips before small issues become expensive repairs.
What’s the best way to clean mould caused by bathroom leaks?
A safe and effective method is to spray a mix of white vinegar and warm water on the affected area, let it sit for 10–15 minutes, then scrub with a brush. For tougher mold, use a baking soda paste. Always dry the area well after cleaning to prevent mouldmould, from returning.
Can a small leak really cause serious damage?
Yes. Even slow, minor leaks can lead to mould growth, damaged flooring, rotting wood, and increased water bills. Early detection is key. Handling leaks right away saves money and protects your bathroom structure.
Should I replace grout or just repair small cracks?
If only a small section of grout is damaged, repairing that spot may be enough. However, if you see multiple cracks or missing grout, it’s better to re-grout the entire area to stop water from seeping behind tiles.
When should I call a professional plumber?
Call a professional if leaks keep returning, if you see water damage on walls or floors, or if the leak is in a hard-to-reach place like inside a wall. A plumber can identify hidden issues and prevent long-term damage.